Utilitarian Objects
Mortars & Pestles Clamps Wrenches/Tooling The Stitching Pony The Crucible A Note on Process
Mortars & Pestles

We humans have been smashing things for a very long time. At some point in prehistory, in our effort to do whatever we do even better, we figured out how to smash things in a slightly more controlled and contained way. Enter the mortar and pestle. The oldest example we’ve found is dated to about 35,000 BC. The Stone Age. As a point of reference, we were smashing things with a mortar and pestle approximately 31,500 years before we invented the wheel.
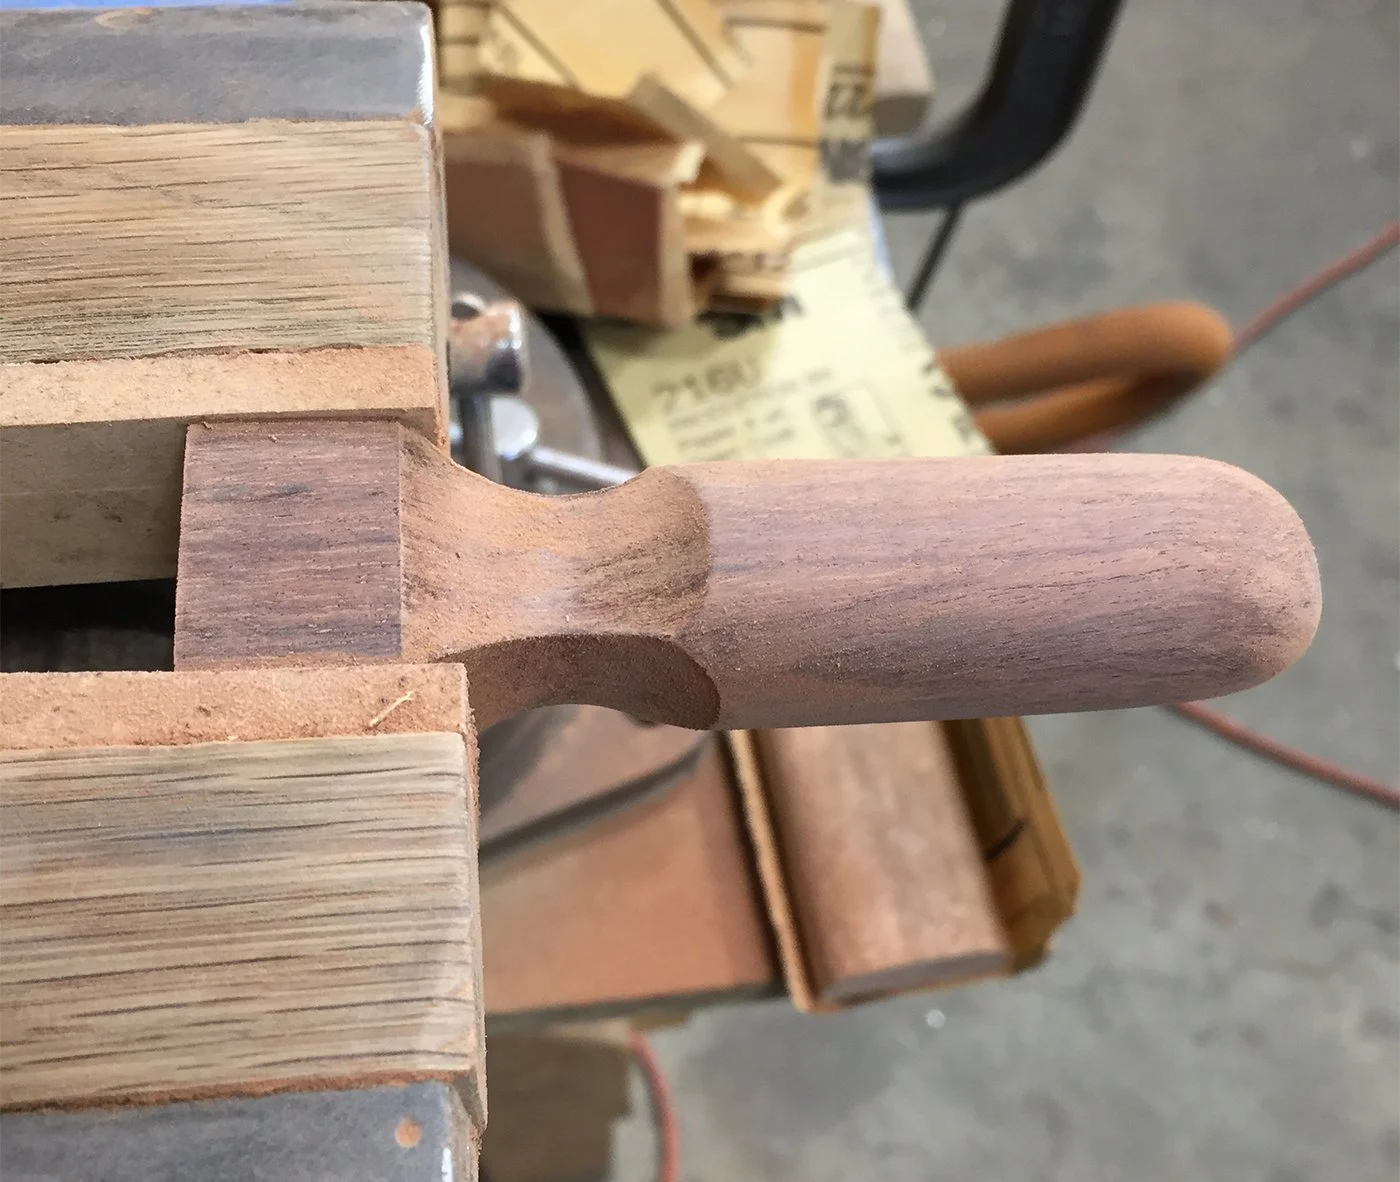
Recently, I found I needed to crush (or chop) some nuts. Instead of looking for a food processor, I went where my heart and mind automatically go, to old world technology. Obviously not in a rush, I decided to make a flat bottom pestle (the red and black one below - Brazilian rosewood and steel). It worked great, and that led to more ideas and eventually full mortars and pestle sets, like the one further below.


The full set below is made from steel and a single block of Claro Walnut, a western species similar to but denser and more figured than the more common Eastern Black Walnut. The design is a bit of a blend of Japanese minimalism and Eastern European brutalism, both of which have always been inspirations for my art.

For continuity - When I was a small child, I was tasked with the job of smashing, with an old and battered bronze mortar and pestle, the mahlepi for my mother’s vasilopita. What that means is that I had to pulverize these little rock-hard seeds (from within the cherry pit). This seed dust, the mahlepi, is a crucial ingredient in many Greek and Middle Eastern breads and baked goods.
I didn’t know it at the time, but that heavy brass mortar and pestle I struggled with (see the photo below) belonged to my maternal great grandmother. I also didn’t know, until last year, that we had the one made of wood (in the other photo below), which belonged to my paternal great grandmother. Both of these made their way from the far side of Europe, across the Atlantic, and eventually across this continent to be here now.


Process Pics


CLAMPS

I’ve wanted newer, better clamps for a while now, and the big C clamps get in the way of everything. The kant-twist type clamps are amazing but cost prohibitive, so I figured I could probably just make them. I started prototyping with some left over 7 gauge (3/16”) steel plate in the shop. The thick plate seemed like overkill, but then overbuilding a clamp isn’t the worst idea.
The rounded clamp with the protruding side bolts (above right) was the first prototype. Due to the significant weight and the extra thick, flat edges, it sits solidly on almost any side, making it easy to position material in the jaws with one hand while turning the handle and closing the jaws with the other. The second version has sharper corners for even more balance and stability, and countersunk screws so the faces sit flat when it’s on its side. And it’s a little more Darth Vader, which is always better. They can be broken down so any part can be fixed or replaced. Also, if I need soft jaws or jaws with a different profile for some fancy clamping, they can be swapped out in a flash.
The next version will have a few significant changes that will make it even stronger and easier to use, and should streamline the fabrication.


Wrenches/Tooling/Fixtures
For most all of us builders, fabricators, machinists, and the rest, needs come up all time for which we have no tools. There is a small group of us who are more inclined to make our own instead of buying them. This decision comes down to several considerations such as cost, complexity, time, materials, and ability. Another is if we can make something that does the job better than what we could buy, especially if we’re dealing with a strange, uncommon need. And, of course, a lot of us who are inclined to make our own tools do so simply because we take great pleasure in it.
Starting with a couple of wrenches, I’ll continually add different tools and fixtures I’ve made and used to make other tools, parts, sculptures, and architectural elements.

Above is a spanner wrench I made to reassemble the nose of the mill after some repairs. The wrench below (both photos) is a different kind of spanner for locking collet blocks. I made both with removable pins and enough material so they can be modified for other needs in the future.


The Stitching Pony
I’ve since learned that when someone asks you to make them a stitching pony, what they mean is, please screw some 2x4s together and stick a rubber band around it. Left to my own devices, this is what happened instead.
With the idea of cheap 2 x 4s out the window from the start, the decision making came down to balancing, in no particular order, strength, functionality, comfort of use, and, of course, aesthetics. The recipient has a deep love of oak, brass, old tools, and old furniture, so that was the starting point.
The oak has lark’s tongue chamfers for both comfort of handling, and so the edges of the base don’t cut into the thighs if it’s being used in the sit and straddle style. It’s heavy enough with all the hardwood and steel that it’s not necessary to straddle it for stability, though. The oak has been darkened with an old-world ammonia fuming and finished with a true Danish oil.
The locking handle (below right) is shellacked Brazilian rosewood with a brass cam and a blackened steel shaft. On the other side, the tensioning handle is blackened steel with a brass “dome” set between it and the wood (bottom left). This keeps the pressure from the handle centered regardless of the angle of the tension rod, and it keeps the handle from binding on the wood.
It’s about 17-18” tall and 6-1/2” wide. All parts (except for the wood screws) were milled, machined, and finished in the shop.


The Wax Crucible
I designed and made this crucible for someone who found herself engaging in the ancient practice of pouring wax seals. She needed to melt enough wax to pour a number of them efficiently (and repeatedly) in one sitting. The bowl is spun, sanded, brushed (outside) and polished (inside) copper. It measures approximately 4-1/2” in diameter. The base is 1/4” thick blackened steel. (Seen here without the fancy and aesthetically pleasing beeswax candle heat source.)


Original Prototype - It seemed functional enough to me, but I was told it needed improvement.


A Note on Process
In these days of computers and robots, I think it makes sense to talk about my processes. I don’t think there’s anything wrong with robots and computers (until they enslave us), or computer numerical control (CNC) machining. The accuracy and efficiency is undeniable. That said, machining by sitting in a chair at a computer console is unbelievably uninteresting to me. Building, for me, has always been as much about the physical act and the process as the finished product. There’s a deep romance some of us feel with old tools and machinery. Using them well is both a science and an art that demands a certain level of hard earned proficiency, as well as being intellectually and physically present and engaged in a unique way. Old machines also have a lot of wear and tear on them. No two are alike or have the same issues and quirks, so using them effectively requires an intimacy and a finesse that is lost in this computer age.
I work entirely with manual machines, pencil and paper, a basic calculator, and old analogue calipers and micrometers. My machines are very old American and British made. I sometimes consider upgrading to some digital elements as I can, such as maybe DROs (digital readout - I currently use the dials on the handles and Trav-A-Dials) and perhaps digital calipers, but I have a hard time seeing myself switching over to CNC machining. Never say never, but… probably never.
I’ll be posting images of my processes both here and on one of my instagram accounts (@nikopraxis) because I think it provides some interesting context. Getting further into the weeds for people who are curious, I’ll also be sharing some of the process of resuscitating a 1941 Brown & Sharpe horizontal milling machine, which I hope will become a big part of my process when I’m done. (Then onto a much larger Kearney & Trecker.)